We already talked about WURFL and Spark in a recent tutorial. If you are here, we assume you are familiar with Apache Spark and the world of data analysis.
As the language of choice of many data scientists, it comes as no surprise that the Spark and Python (and Pandas!) worlds would join forces sooner or later in what some might describe as a marriage made in heaven. PySpark is the Python implementation of all Spark APIs, including the streaming API.
Augmenting your existing data, be it web logs analytics or an Event Streaming application, with Device Intelligence is a way to produce exciting new analysis and data visualizations. Ultimately you’ll gain new insight into how users are taking advantage of your service.
In this article, we will show you how you can integrate WURFL with Pyspark Streaming to open up to a host of new possibilities.
We will focus on the WURFL Microservice API specifically. If you are in a hurry to give the solution we present here a spin, you can obtain WURFL Microservice from the three major Cloud Providers (i.e. AWS, Azure and GCP) marketplaces without need to engage your procurement department. Alternatively, you can contact ScientiaMobile for a trial version of our WURFL Microservice for Docker (references later).
Note: If you already own a license to the PyWURFL API, you should be able to adapt the code with little effort. You can contact ScientiaMobile through your dedicated support channel if in doubt.
This document hinges on a demo application that exemplifies the salient aspects of WURFL integration with Spark.
Here are the prerequisites for creating and running the application.
-
- Spark 2.x and above.
- Java 8 and above.
- Python 3.5 and above.
- The
netcatcommand. - A WURFL Microservice instance, obtainable from the AWS, Azure or the Google Cloud Platform marketplaces, or directly from ScientiaMobile in the form of a Docker image.
WURFL Microservice for AWS, Getting Started Guide.
AMIs available at: https://aws.amazon.com/marketplace/seller-profile?id=2057b3f8-99bf-4050-9cb4-74688eea04cb&ref=dtl_B076MBJCYQ
WURFL Microservice for Azure, Getting Started Guide.
VMs available at: https://azuremarketplace.microsoft.com/en-us/marketplace/apps?search=scientiamobile&page=1
WURFL Microservice for GCP, Getting Started Guide.
VMs available at: https://console.cloud.google.com/marketplace/browse?q=WURFL
The demo application shows the use of WURFL Microservice (client and server) to add Device Detection to a PySpark Streaming app.
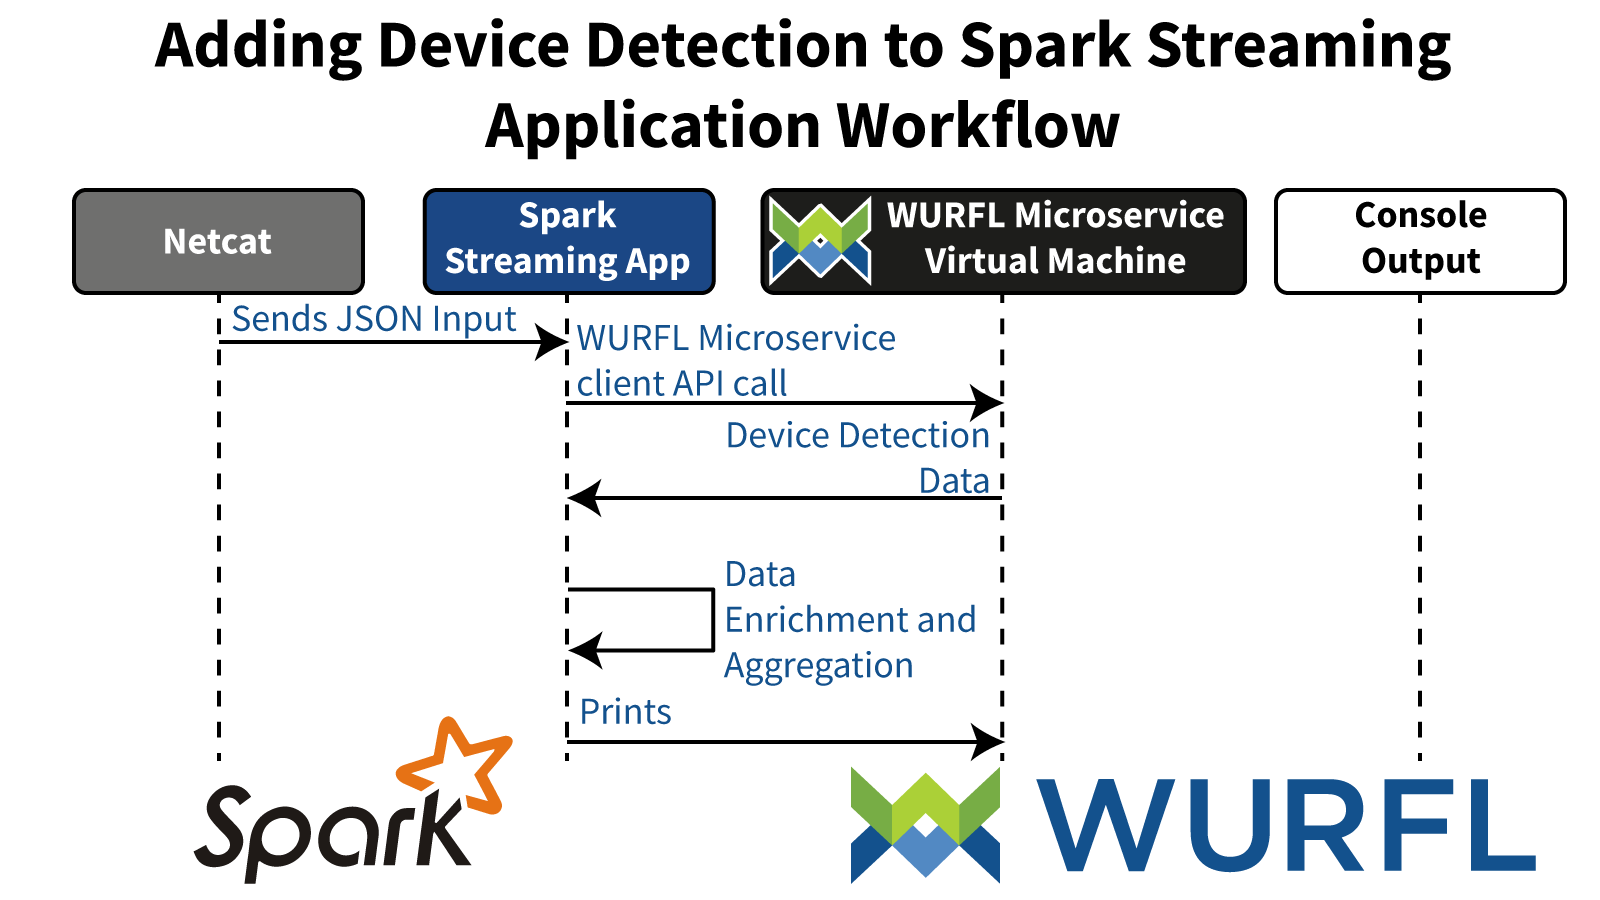
Here is the application workflow:
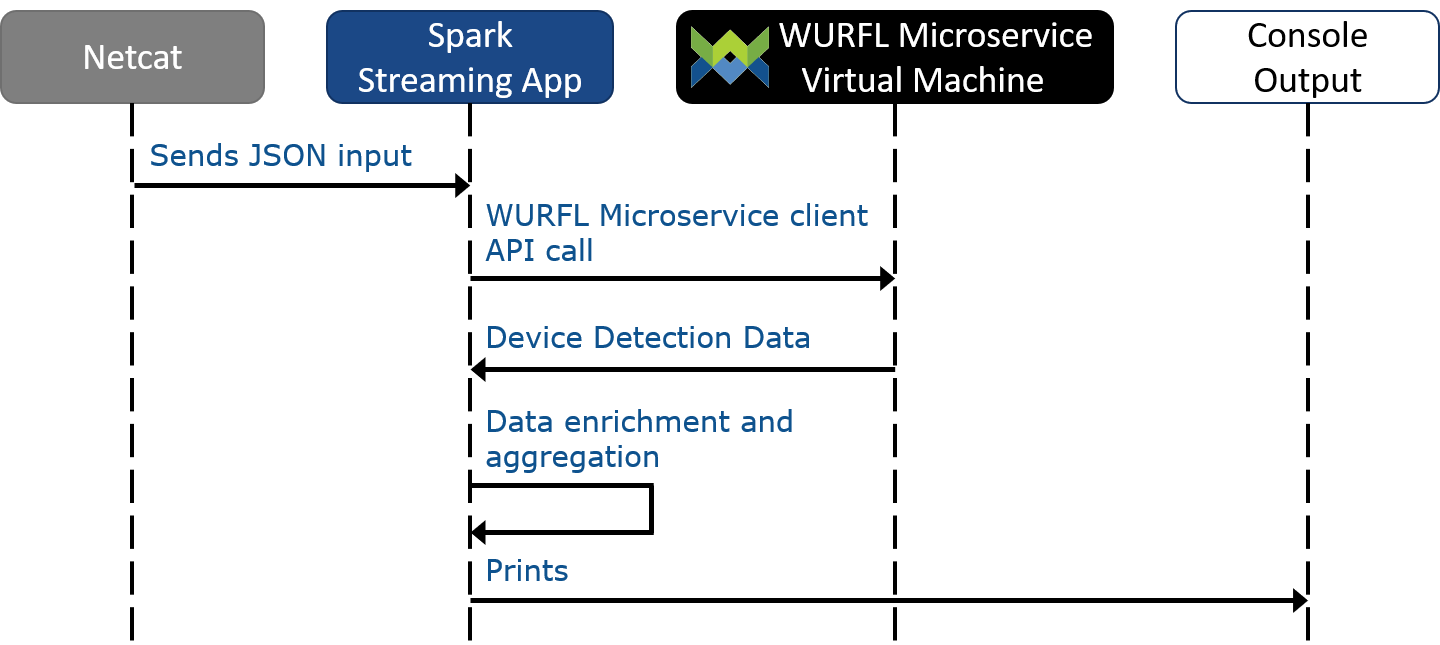
We will use the netcat command to pipe HTTP request headers in JSON format to our application via a socket bound on port 9999.
Note (taken from Wikipedia): netcat (often abbreviated to nc) is a computer networking utility for reading from and writing to network connections using TCP or UDP. The command is designed to be a dependable back-end that can be used directly or easily driven by other programs and scripts. At the same time, it is a feature-rich network debugging and investigation tool, since it can produce almost any kind of connection its user could need and has a number of built-in capabilities.
The JSON input looks something like this (content is always a JSON array).
Note: The User-Agent HTTP header (occasionally accompanied by other headers, as in this case) is the standard way for a device to signal information about itself to the HTTP server. For historical reasons, those headers are not simple to decipher across the board.
[{
   "Save-Data":"on",
   "Accept-Language":"en",
   "Accept-Encoding":"gzip, deflate",
   "X-Operamini-Features":"advanced, camera, download, file_system, folding, httpping, pingback, routing, touch, viewport",
   "X-Forwarded-For":"103.38.89.102, 141.0.8.173",
   "Accept":"text/html, application/xml;q=0.9, application/xhtml+xml, image/png, image/webp, image/jpeg, image/gif, image/x-xbitmap, */*;q=0.1",
   "User-Agent":"Opera/9.80 (Android; Opera Mini/39.1.2254/163.76; U; en) Presto/2.12.423 Version/12.16",
   "X-Operamini-Phone-Ua":"Mozilla/5.0 (Linux; Android 9; moto g(6) plus Build/PPWS29.116-16-15; wv) AppleWebKit/537.36 (KHTML, like Gecko) Version/4.0 Chrome/73.0.3683.90 Mobile Safari/537.36",
   "Device-Stock-Ua":"Mozilla/5.0 (Linux; Android 9; moto g(6) plus Build/PPWS29.116-16-15; wv) AppleWebKit/537.36 (KHTML, like Gecko) Version/4.0 Chrome/73.0.3683.90 Mobile Safari/537.36",
   "Event":"VIDEO_OK",
   "Video-id":"TPhZnruRPsM",
   "Forwarded":"for=\"103.38.89.102:49931\""
}]
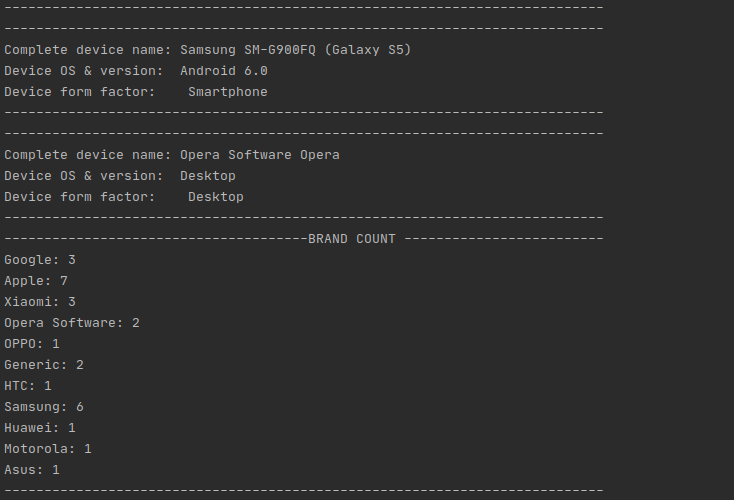
The application uses the headers contained in the JSON data to perform a device detection and enrich that same JSON stream with additional information such as device brand, device model and Operating System. The console prints out detection data along with aggregated info count of how many devices were detected for each brand.
The application output in the console will look like this:
Get the demo application
You can find the Spark Streaming application code here:
https://github.com/WURFL/wurfl-microservice-examples/tree/master/event-streams-spark_python
Installing and running the application on Spark
Before running our PySpark app, we need to set some environment variables:
export SPARK_HOME=<path_to_your_spark_installation>
export PYSPARK_PYTHON=/usr/bin/python3
(or your Python3 installation directory if different from the default one). On
Windows you can set them via the control panel or the set command.
export PATH=$SPARK_HOME/bin:$PATH
To run the app on a standalone Spark installation, run the following command:
python3 spark_processor.py
Sending Data to the Spark Application
cd into the project root directory and run the following command:
nc -lk 9999> < event_stream_mid_compr.json
This will send the content of the JSON file to a socket that is waiting for our data . Repeat this command two or three times to see the results appear in the console.
Note: Our application processes the data it receives at 30 second intervals. This means that you may have to wait a few moments before the console shows some action.
Application Code
Spark can run applications written in multiple programming languages: Scala ( Spark’s “language of choice”), Java, Microsoft .NET and Python. For the purposes of this tutorial, we picked the Python WURFL Microservice client API. As you are probably aware.
from pyspark import SparkContext
from pyspark.streaming import StreamingContext

# WM client imports
from wmclient import WmClient

# # Other imports
import json
import argparse
We import the WURFL Microservice, Spark Streaming and python JSON API libraries.
As Spark starts the application, certain self-configuration steps will take place. The following code sets up the following information:
- The application name.
- The time interval at which it must process the JSON data it receives.
- Process will run on a local Spark server using up to 4 threads.
All configurations are enclosed in a context object (jssc) that handles the application lifecycle.
c = SparkContext("local[4]", "WurflDeviceDetection")
# Duration of 1 second here
ssc = StreamingContext(sc, 30)
We then create a receiver socket (listening on RECEIVER_HOST:RECEIVER_PORT) to which JSON event data will be streamed.
stream = ssc.socketTextStream(self.RECEIVER_HOST, self.RECEIVER_PORT)
// localhost,9999
The stream object is the Python implementation of a Spark Dstream, a “discretized stream” (Spark lingo) of data for a given time interval (streamed data are Spark Resilient Distribution Data Sets (RDDs), more about them here)
We now invoke a mapping function for each chunk of JSON data received from the stream:
events = stream.map(lambda line: lookup_VM(line))
In the lookup_VM function , before performing a device detection, we need to parse the input JSON data into python structures:
evs = json.loads(line.encode().decode('utf-8-sig'))
Then we get a WURFL Microservice client instance, perform the device detection using the lookup_headers function and append the results to a capability map. This is sufficient for the sake of this tutorial, but you may often want to keep a list of the device structures rather than just the map of their device properties (WURFL capabilities).
for headers in evs:
   # We get the WURFL Microservice client instance and perform device detection
   device = getOrCreateClient().lookup_headers(headers)
   # Error handling
   if device.error is not None and len(device.error) > 0:
       print("An error occurred: " + device.error)
       return "An error occurred: " + device.error
   else:
       result.append(device.capabilities)

return result
The mentioned getOrCreateClient() function creates the WURFL Microservice (WM) client or just returns it if it has already been created. Creating a new WM client for each operation is time consuming and would pretty much knock out its caching layer . We address the problem inside this function storing the client into python globals() dictionary.
Note: we could have taken the User-Agent header as the key for our Device Detection. We elected to provide the WURFL API with all the headers. Let’s just say for now that this is more “future-proof”.
After the device detection step, we have extracted the device capabilities or returned an error message in case something went wrong, both these cases are now handled by the output function invoked on the dstream, which prints device data and counts how many devices of each brand (Motorola, Apple, Samsung, etc.) have accessed the service:
events.foreachRDD(lambda rdd: rdd.foreach(console_output))
In detail, console_output prints the value of the selected device capabilities (device brand, model and os names, device form factor) and evaluates the brand occurrence count. In case the resulting is of type string, it prints it, since it is an error message.
for evs in rdd:
   if isinstance(evs, str):
       print(evs)
   else:
       print("--------------------------------------------------------------------")
       print("Complete device name: " + evs["complete_device_name"])
       print("Device OS & version:  " + evs["device_os"] + " " + evs["device_os_version"])
       print("Device form factor:    " + evs["form_factor"])
       print("--------------------------------------------------------------------")

       if evs['brand_name'] not in brand_count:
           brand_count[evs['brand_name']] = 1
       else:
           brand_count[evs['brand_name']] += 1
print("--------------------------------- BRAND COUNT ----------------------")
for key in brand_count:
   print(key + ": " + str(brand_count[key]))
print("--------------------------------------------------------------------")
For sake of this tutorial, detection count is computed at RDD level, which means that detections are counted for every chunk of data sent to Spark in each execution cycle. The sum of all detections from the application start is not counted. You can code this enhancement as an exercise in your free time.
Finally, to get the party started, we must tell the application to start receiving data streams This is easily achieved:
ssc.start()
ssc.awaitTermination()
The methods are pretty self-explanatory: the first starts the streaming context, allowing data to flow and be processed by the application. The second waits for the stream to terminate.
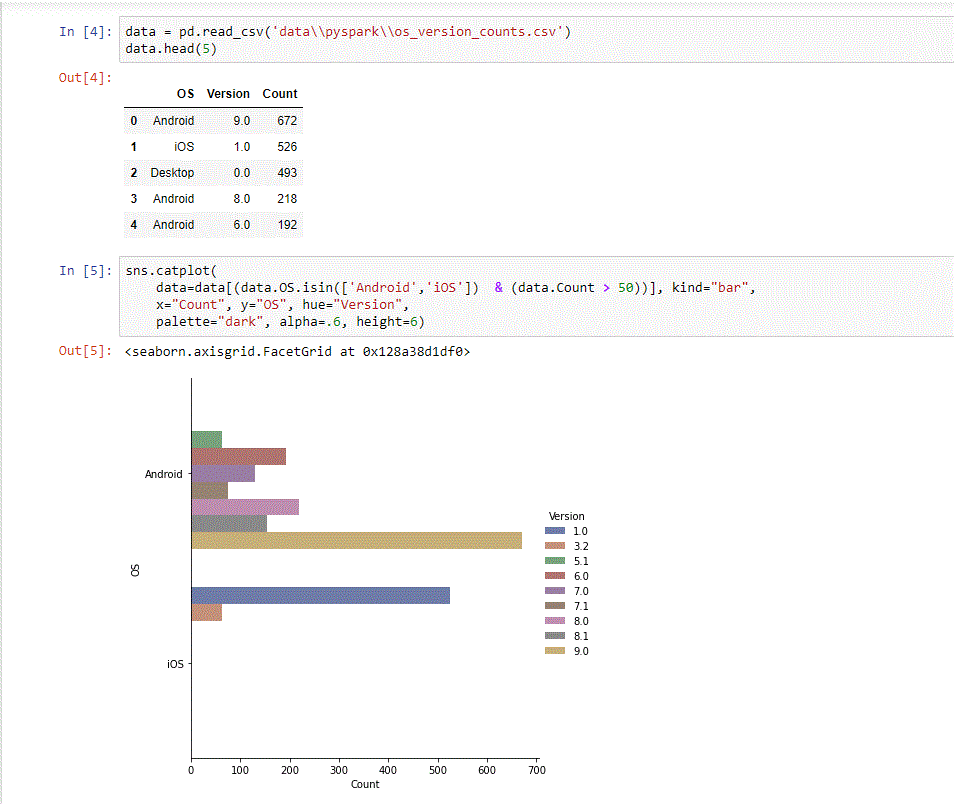
DataViz of PySpark Device Detection
While the first version of Spark as RDDs (Resilient Distributed Datasets) as the lynchpin of its API, Spark 2.0 abstracted that away with DataFrame, which were obviously inspired by Pandas and that will make Python programmers feel right at home (as an aside, check out Koalas if you want to feel even more at home).
If you are using Spark, you’ll probably have your own dashboard and solution for reporting, analytics and data visualization.
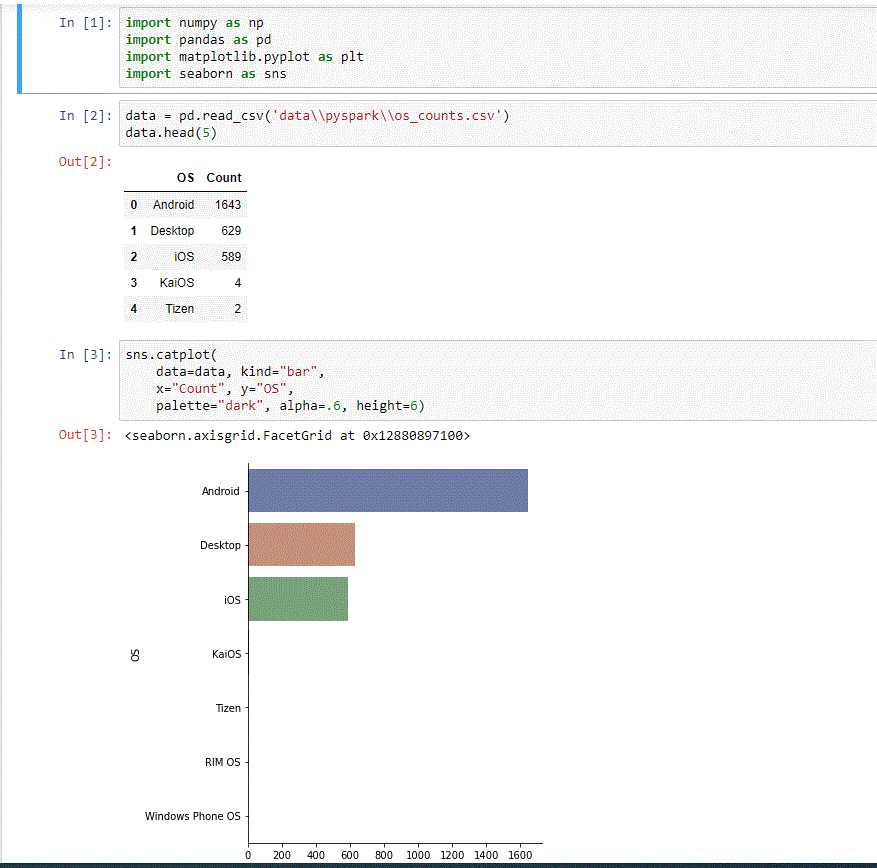
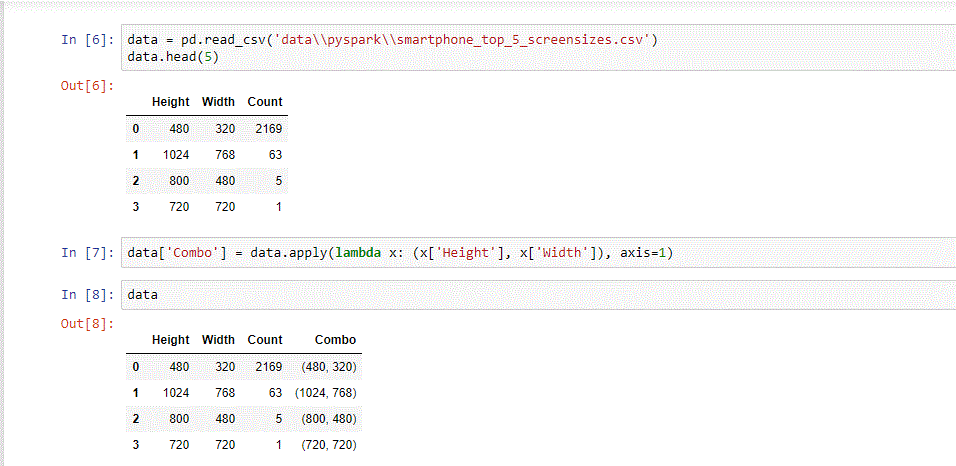
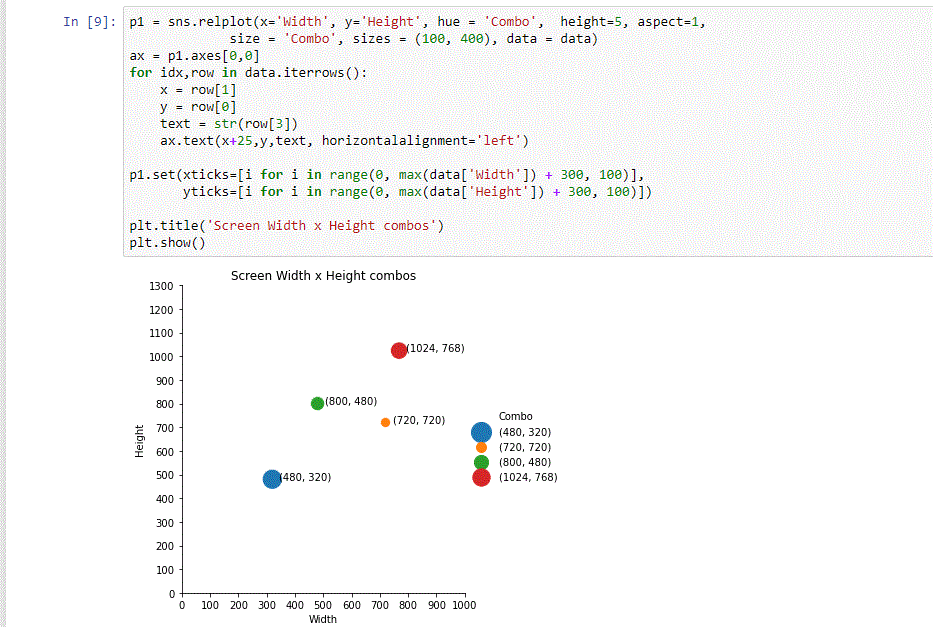
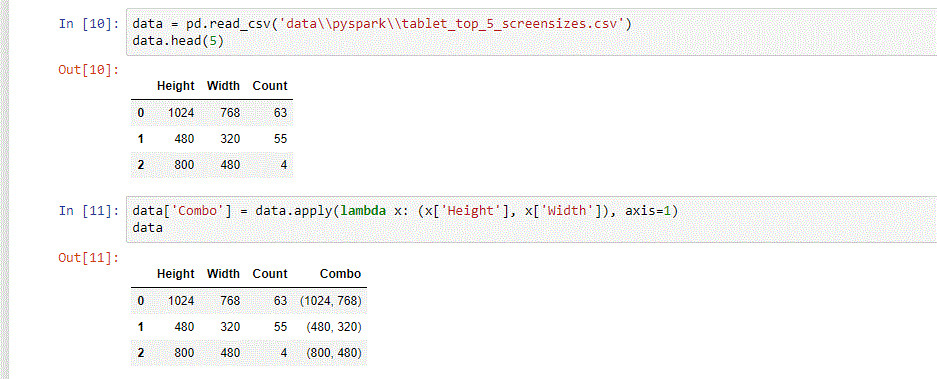
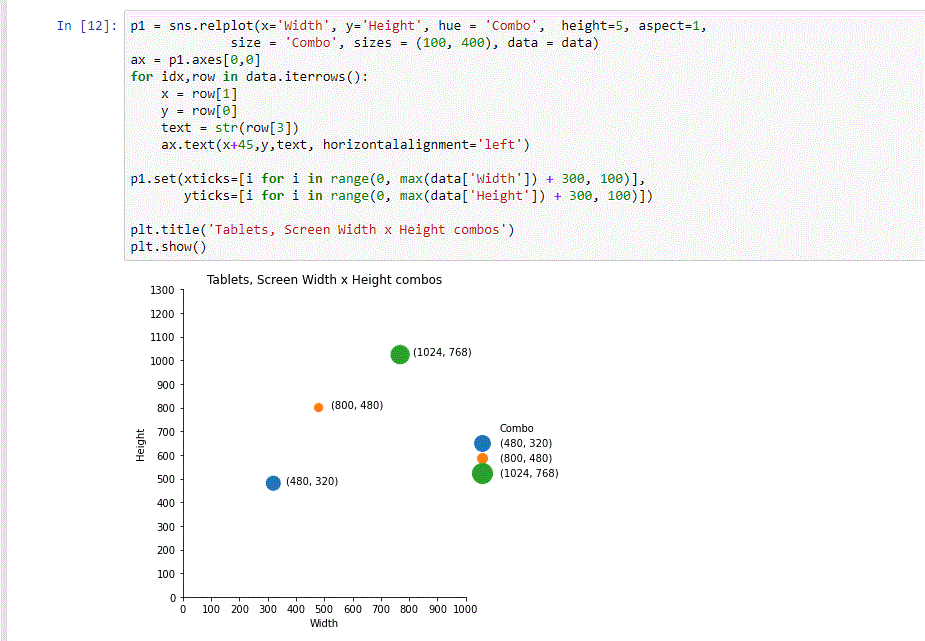
For the purpose of this tutorial, we used our PySpark API and Pandas to generate simple CSV reports, and Jupyter Notebook and Seaborn to visualize them.
Conclusions
Apache Spark has been used as the in memory data engine for big data analytics, streaming data and heavy-duty data analysis workloads. Thanks to WURFL Microservice and the Python Client, Spark can now process log data to add a new dimension to data analysis and to your understanding of how end-users are adopting your service.


