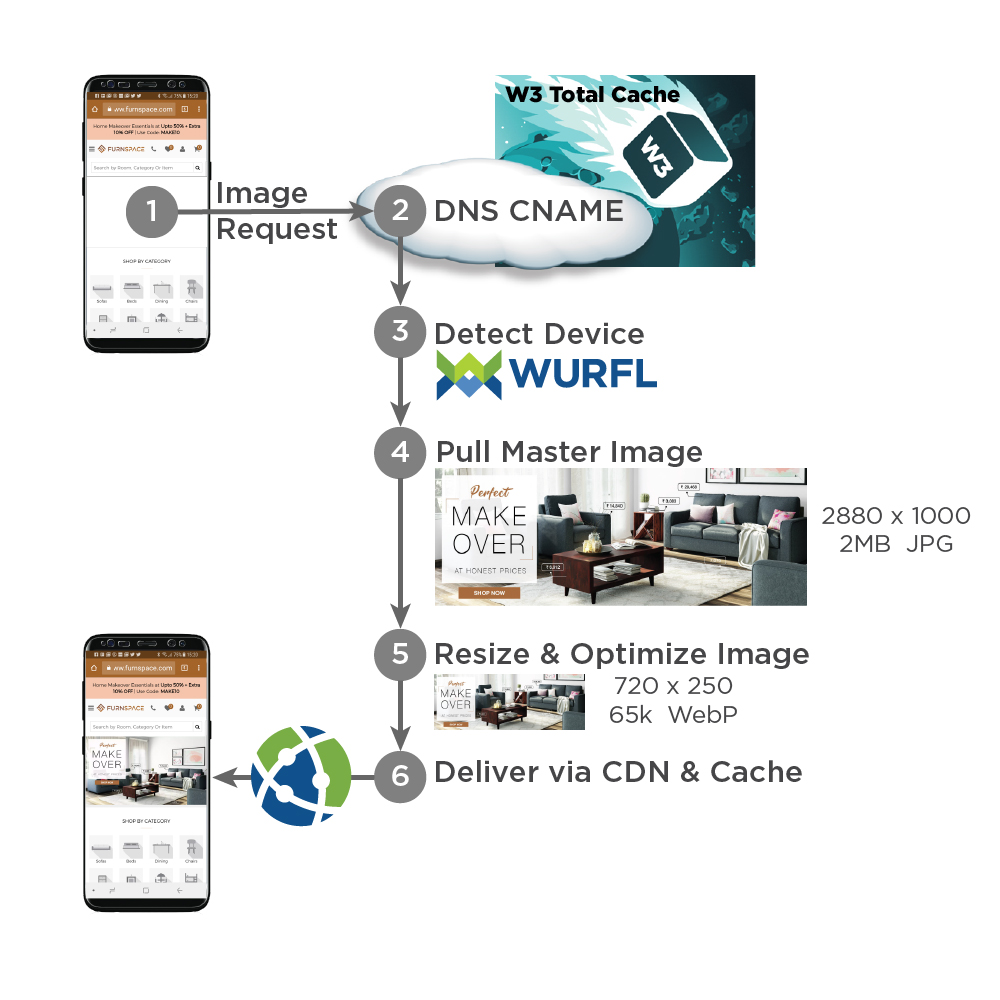
4 Steps to Simplify WordPress Image Optimization by Using W3 Total Cache for CNAME
The deployment of ImageEngine is made even easier by using W3 Total Cache. Adding the W3 Total Cache plugin gives WordPress users control over using a CDN and directing traffic using CNAME. Once installed and configured as shown below, ImageEngine can dynamically pull the master images in WordPress and optimize the images for specific device models. This arrangement reduces image payload by over 60% and dramatically improves page load time.

1. Install W3 Total Cache:
In the WordPress Admin portal, click Plugins > Add New and search for “W3 Total Cache.” If you haven’t already installed the plugin you should see an “Install Now” button on the top right. Once you have installed, go to Plugins > Installed Plugins, find the W3 Total Cache plugin and click activate.
2. Configure W3 Total Cache:
Once you have W3 Total Cache properly installed you should see a “Performance” section in the admin portal. Click Performance > General Settings and find the CDN section, towards the middle of the page. Check the box to enable CDN and select Generic Mirror as the CDN type. Once you have completed this, click “Save All” settings found in the CDN section.
3. Configure SSL and Hostname:
Once you have completed the “Generic Settings” section, go to Performance > CDN. If you want to enable SSL support, go to the “Configuration: Objects” and enable SSL support, enter the hostname or CNAME provided by ScientaMobile, and click “Save All” settings. Additional steps may have to be taken to enable SSL through the ImageEngine CDN.
4. Enable CDN for Images:
Finally, in the CDN section, scroll down until you find the advanced section. Find wp-includes file types to upload and Theme file types to upload, add *.gif,*.png,*.jpg,*.jpeg,*.webp,*.bmp,*.jp2,*.svg, to both sections. Once you have done this, click “Save All” settings and you are all set.


